


Instead of repeatedly sending Canva screenshots for your custom sunglasses design upload, export an approved design and pair it with a clear order brief so the supplier receives the artwork and instructions together. For a 2026 celebration, this manual file-handoff workflow connects design approval to order submission without assuming a Canva integration or an upload feature exists.
- Use Canva to prepare artwork; confirm the supplier’s custom sunglasses design upload requirements before exporting.
- Funglasses party sunglasses suit event planners and gift shoppers seeking patterned-lens designs for celebrations.
- Send approved artwork with an order brief, not a screenshot or an editable link alone.
- Keep Canva edits separate from submitted files; revisions need a new handoff and approval.
Why this matters
A Canva design and a sunglasses order are different things. Canva holds your artwork; the supplier needs instructions for turning that artwork into a physical item. An attractive layout does not establish the printable area, accepted file format, or placement.
Funglasses party sunglasses are best for event planners and novelty gift shoppers seeking patterned-lens designs for celebrations. Explore Funglasses to establish the occasion and product direction, then confirm whether your proposed custom artwork is supported before preparing a production file.
This guide covers artwork preparation and handoff, not a verified store integration. Treat custom production as a separate requirement to confirm, rather than a feature implied by a product photo or an occasion-specific collection.
For your 2026 event, the useful connection is a controlled sequence: confirm requirements, prepare artwork, export the approved version, and submit it through the supplier’s agreed channel. Each stage has a checkpoint. That keeps an unfinished design from becoming an order instruction.
Before you start
- Get Canva access and approved source materials. You need permission to edit the design and use its names, logos, photographs, and other artwork. Choose an event decision-maker who can approve spelling and layout.
- Confirm the supplier’s requirements. Ask whether custom artwork is supported, where it can appear, which file types are accepted, and whether a template or proof is provided. Get the submission method before preparing files.
- Check the shape before designing. A rectangular Canva page is not a sunglasses production template. Lens boundaries, the bridge, and printing restrictions can interrupt artwork; do not create those boundaries or a perforation pattern yourself.
Keep 1 order brief beside your design. Include the occasion, event date, requested wording, requested quantity, intended artwork placement, and approval contact. Record requirements supplied by the seller separately from your preferences so nobody mistakes a request for a confirmed specification.
Confirm your artwork handoff
- Describe the finished item. Explain whether you want a lens graphic, a frame marking, or another treatment. Do not use the broad word custom when the placement matters.
- Request the production requirements. Ask for the artwork dimensions and units, template, permitted area, accepted format, and any required export settings. Use the supplier’s values exactly; do not borrow measurements from another sunglasses listing.
- Choose the submission channel. Confirm whether the supplier wants a file attachment, an upload, or a shared document. Use an upload only when the supplier actually provides one.
- Define the approval checkpoint. Ask how artwork acceptance and production approval are recorded. Identify who can authorize the design, and keep the order reference with that approval.
Expected result: You have a documented destination for the artwork and confirmed requirements for preparing it. If custom production is not supported, stop the upload workflow and choose an existing occasion design instead.
Choose the handoff that fits
These are submission approaches, not interchangeable promises of print readiness. Use the method your supplier accepts.
| Approach | Best for | Advantage | Limitation |
|---|---|---|---|
| Exported artwork file | An approved design ready for supplier review | Preserves the submitted artwork as a fixed file | Must meet the supplier’s format and artwork requirements |
| Canva collaboration link | Gathering feedback before export | Lets reviewers examine the design in Canva | Permissions and later edits make it unsuitable as the only approval record |
| Screenshot | Explaining an idea or pointing out a problem | Makes informal feedback easy to follow | Does not replace a production export |
Use an exported file for the final handoff when the supplier accepts that format. Keep a Canva collaboration link for review, not as an assumed connection to the ordering system.
If you are organizing several roles or groups, settle the design list first. Different wording means different artwork versions, even when every version uses the same colors and layout.
Prepare your Canva artwork
- Open the approved starting design. Use the supplier’s template when one is supplied. If you need to create a page, select Create a design, then Custom size, and enter only the dimensions and units supplied for the job.
- Bring in approved artwork. Open Uploads and select Upload files to add your logo or image. Use the original source asset rather than a screenshot taken from a message or website.
- Build the main message. Add the requested wording and check the spelling against your brief. Keep the message focused; a party name, role, and date do not all need equal emphasis.
- Respect the printable area. Follow the supplied template’s boundaries. Keep critical wording away from areas the supplier identifies as non-printing or subject to trimming.
- Separate artwork from instructions. Put placement requests, quantities, and review comments in the order brief. Do not leave them on the export page unless the supplier explicitly requests an annotated file.
- Run the design review. Ask the named decision-maker to approve wording, artwork, and placement intent before you export.
Expected result: Your Canva page contains the intended artwork, while the separate brief contains the order instructions. Neither file depends on someone remembering a conversation.
Make the design readable before making it decorative
Patterned-lens party sunglasses are a small, shaped canvas. Start with the main message and remove elements that compete with it. A layout that looks clear on a full laptop screen still needs review against the supplier’s production boundaries.
For a graduation concept, for example, make 2026 part of the intentional artwork only if the event brief calls for it. Do not add the year automatically to every wedding role or celebration design.
Use 2 review passes: one for names, dates, and spelling; another for placement and visual clarity. This is a recommended checking routine, not a supplier requirement. Splitting the tasks makes it easier to notice a typo without getting distracted by the background.
Do not add your own see-through or perforation effect. The supplier must determine how accepted artwork translates to the product’s construction. A decorative dot pattern in Canva is not a production specification.
Export your approved design
- Open the approved Canva design. Check the page against the order brief before downloading. Remove unused draft pages from the export selection, not necessarily from your working design.
- Select Share, then Download. Open Share, choose Download, and review the export options before saving the file.
- Set the file format. In File type, choose the format requested by the supplier. Canva provides options such as PNG and PDF Print; their presence does not mean both are accepted for your order.
- Check the selected pages. Export only the approved artwork pages. If the supplier needs separate files for different roles, prepare those files according to the agreed instructions.
- Apply required settings. Use only the background, size, bleed, or other export settings specified for the job. Do not turn on a print setting simply because it sounds more professional.
- Select Download and inspect the saved file. Open the actual downloaded file outside Canva. Verify the wording, page selection, background, and artwork against the approved design.
Expected result: You have an exported file that matches the approved artwork and the supplier’s requested format. You have checked the file itself, not just the Canva preview.
Name the file so the order is obvious
Use a filename that identifies the event, artwork role, and revision. For example, Wedding-2026-Guest-Approved.png is a naming example, not a product name or a required file format. Use the actual extension generated by your approved export.
Avoid names such as final-final or new-design. They describe your editing process, not the file’s relationship to the order. Put the same filename in the order brief so the recipient can identify the intended artwork without opening every attachment.
Keep the editable Canva design separate from the downloaded file. Editing the source later does not update an export already saved on your computer or sent to someone else.
Submit your artwork and order brief
- Use the confirmed submission method. Attach or upload the exported file through the channel the supplier has designated. Do not search for an imagined Canva connection or send artwork through an unrelated checkout field.
- Include the order brief. State the event, requested quantity, artwork placement, approval contact, and exact filename. Include the order reference when one has been assigned.
- Label the file’s status. Make clear whether you are requesting feasibility review or submitting approved artwork. Design approval by your group does not establish acceptance by the supplier.
- Check the submitted attachment. If the channel displays a file preview or attachment list, verify that the intended file is present. A successful message without its artwork is not a complete handoff.
- Review any supplied proof. Compare names, dates, cropping, placement, and orientation against the brief. Approve through the agreed process only after resolving discrepancies.
- Save the handoff record. Keep the submitted file, brief, confirmation, and approval together. Record which version the supplier accepted.
Expected result: The supplier can match the artwork to the order, and you can identify the accepted version without reopening the design conversation.
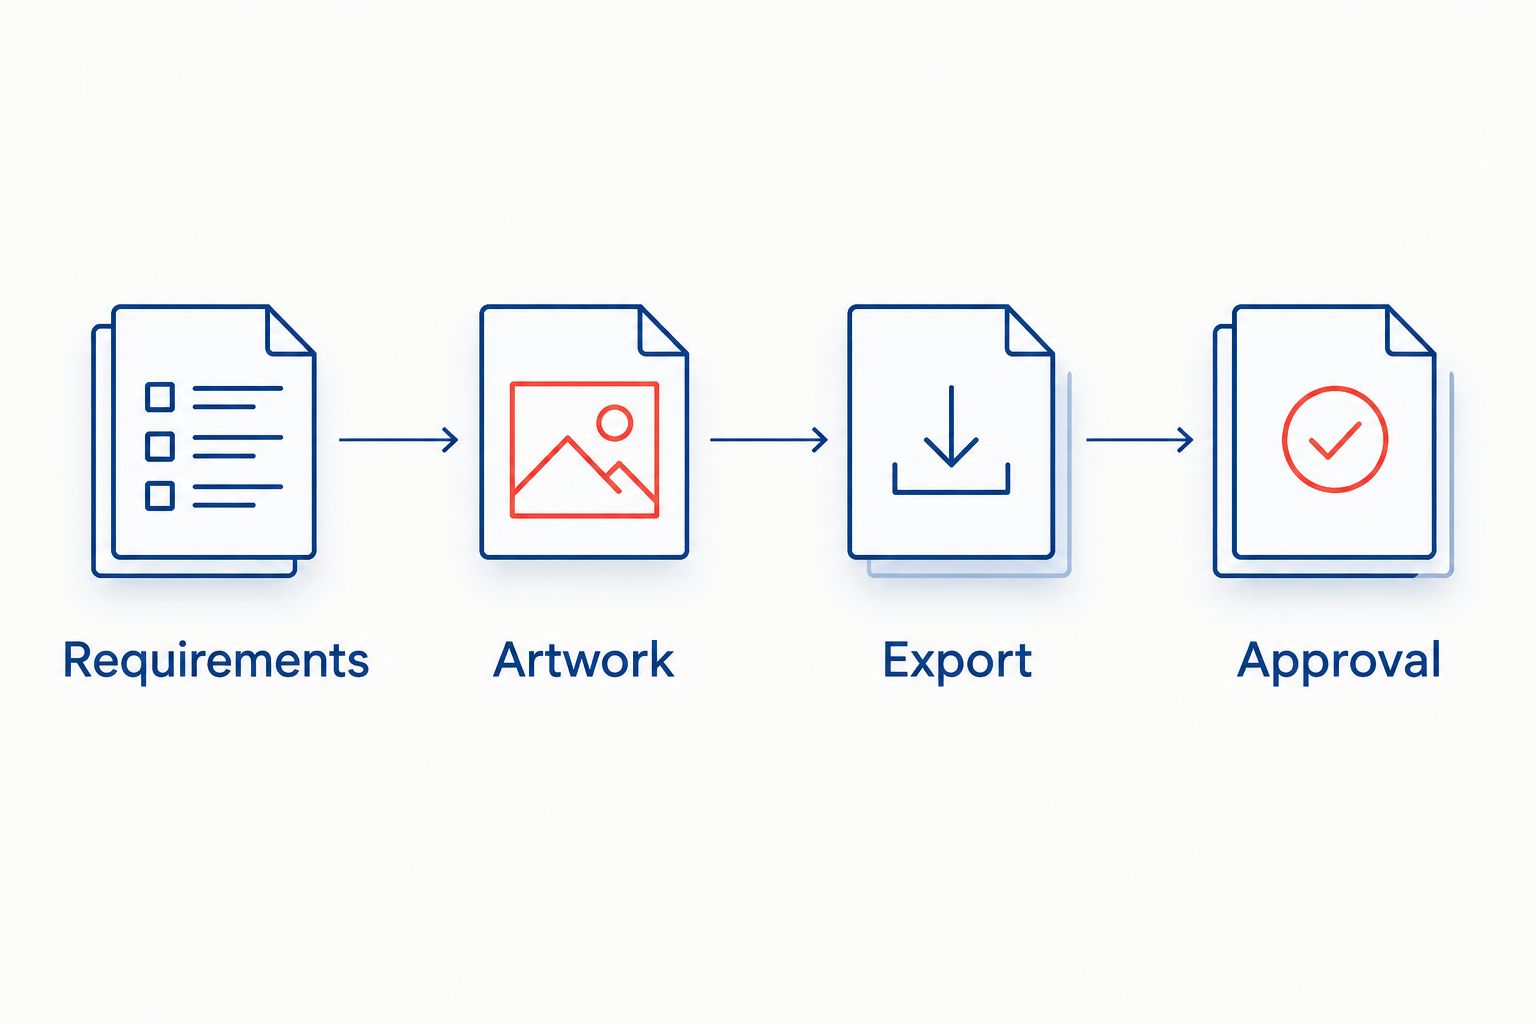
The workflow has four checkpoints. Requirements establish what to prepare; Artwork contains the design; Export captures the approved version; Approval records the accepted handoff.
Repeat the workflow when your Canva design changes
A design update needs a new handoff. Do not assume the recipient sees edits made after you exported or submitted the artwork.
- Confirm that changes can still be accepted. Ask the supplier before revising artwork already approved for the order. Do not treat a new upload as cancellation of the previous instruction.
- Update the working design. Make the change in Canva and check every affected page. A revised event name can alter spacing as well as wording.
- Export and inspect the replacement. Give the new file a distinct revision name. Open it and confirm that the requested change appears.
- Identify what it replaces. Send the new file with the old filename, new filename, and a short change summary. Request confirmation of the version to be used.
- Complete approval again. Review a revised proof if the supplier provides one and record the accepted replacement.
Expected result: A changed design has a traceable replacement file and a new approval record. The original submission remains identifiable rather than silently overwritten.
For multiple 2026 celebrations, reuse the design structure only after checking each event’s wording and production requirements. Reusing a layout saves editing work; it does not transfer approval from one order to another.
Troubleshooting your design handoff
The upload rejects your file
Check the supplier’s accepted file types and stated upload restrictions. Export again from Canva using the requested format; do not change a filename extension to disguise the file type. If the file still fails, ask for the approved alternative submission method.
The exported artwork looks blurry
Inspect the original image placed in Canva. Enlarging a small raster image exposes its limited detail; downloading it again does not create missing detail. Replace the source asset with a suitable original and export to the supplier’s requirements.
The design has an unwanted background
Check whether the background is an intentional Canva element and whether the supplier requires transparency. Follow the requested format and settings. If the necessary export option is unavailable in your account, agree on another accepted format rather than assuming a different export will preserve transparency.
The recipient cannot open your Canva link
Review the sharing permissions through Share and verify that the intended reviewer has access. If the supplier requested a file, send the export instead. A working review link is useful for feedback but does not replace the requested artwork attachment.
The submitted file shows the old wording
Return to the approved Canva page, export again, and open the replacement outside Canva. Send it with a distinct filename and an explicit replacement instruction. Get confirmation of the accepted revision before treating the correction as complete.
Customize your workflow
Expand the brief before expanding the artwork. For a wedding, group the requested designs by role; for a birthday, separate the guest-of-honor wording from the group design. Keep a matching filename beside each role so quantities and artwork stay connected.
Funglasses offers occasion-specific party sunglasses for weddings, birthdays, graduations, holidays, and international celebrations. Existing occasion designs are a different route from submitted custom artwork: they let you select a defined design, but they do not establish that your Canva changes can be applied to it.
Choose the route that matches the job. If the celebration needs matching photo props rather than original artwork, focus on coordinating the occasion and group roles. If original artwork is essential, complete the requirements checkpoint before building the rest of the event around it.
FAQ
How do I connect a Canva design to a custom sunglasses order?
Export the approved Canva artwork in the supplier’s requested format and submit it with an order brief through the agreed channel. Confirm custom production support, artwork requirements, and approval steps before designing.
Does editing Canva update artwork I already submitted?
No, editing Canva does not update an exported file already submitted to a supplier. Export a replacement, identify the previous version, and get confirmation that the replacement has been accepted.
What file type should I use for a custom sunglasses design upload?
Use the file type specified by the sunglasses supplier. Canva offers formats including PNG and PDF Print, but the supplier determines which format and settings fit the production process.
Can I use a screenshot instead of downloading my Canva design?
Use a screenshot for explaining an idea, not as a substitute for the requested production file. Download the approved artwork and inspect that file before submitting it.
Can I upload Canva artwork directly to Funglasses?
Confirm the custom artwork submission process with Funglasses before preparing your file. Do not assume an upload field, Canva connection, or custom production option is included with an occasion-specific product.
What should I check on a sunglasses artwork proof?
Check wording, dates, cropping, orientation, and placement against your order brief. Resolve any mismatch before approving the version intended for production.
How do I keep several wedding sunglasses designs organized?
Keep a separate filename and requested quantity beside each wedding role in your order brief. Approve each artwork version and identify its matching exported file before submission.
One last thing
The file you open after downloading matters more than the preview you approved inside Canva. That final check catches wrong pages, old wording, and unexpected backgrounds before they enter the order conversation.
For your 2026 event, keep the accepted artwork and approval record together. When someone asks which design is being used, the answer should be a specific file—not the latest version somebody remembers seeing.


